
Contents:
Three ways to take a screenshot
If you need one general rule, it is this: take a screenshot using buttons, a system menu, or a built-in tool that lets you select an area and save it.
Keep a second method handy. It helps when you cannot capture the right moment with buttons or only need part of the screen.
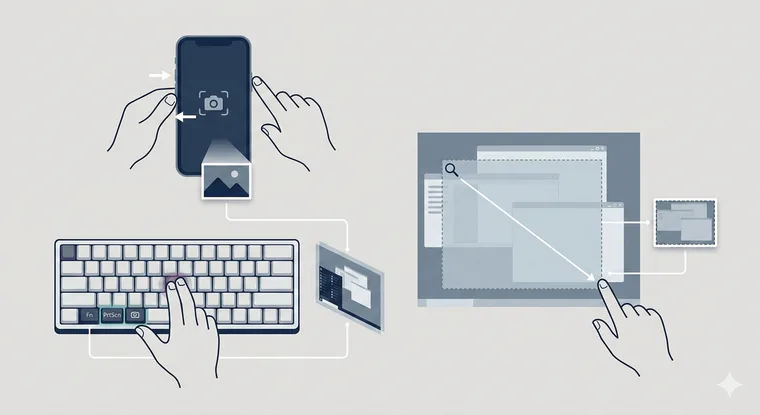
- Using buttons (the quickest way). Open the screen you need → press the appropriate buttons on your phone or keys on your computer simultaneously → release them → open the screenshot and crop it if necessary.
- Using a system menu (when buttons are inconvenient). Open your phone’s screenshot menu, if it has one, or Snipping Tool/Screenshot on your computer → capture and save the image.
- Using an area-selection tool (when you need a section). Start an area-selection tool, if your device supports one → draw a rectangle around the section you need → paste it into a chat or save it as a file. On a phone, you may need to crop the finished screenshot instead of selecting an area beforehand.
If you often need to show your team “the error is here” or “this has been approved,” adopt a shared habit: take screenshots consistently and keep them in one place. Keep internal instructions nearby too, so you do not have to collect answers from separate chats.
Screenshots on iPhone and iPad
After taking a screenshot on iPhone or iPad, open its preview: depending on the system version and settings, you may see a thumbnail or a full-screen window. The editor lets you crop the image and add annotations. To hide information, it is safer to crop out the relevant area or cover it with an opaque fill; a translucent marker does not guarantee concealment.
Method 1 (buttons). On an iPhone without a Home button: side button + volume up. On an iPhone with a Home button: side (or top) button + Home.
Method 2 (menu). With accessibility features enabled, you can add a screenshot action to AssistiveTouch. You can then take a screenshot from the floating on-screen menu.
Method 3 (a section or a full page). Safari and some other apps offer Full Page mode after you take a screenshot. For example, you can save an entire webpage in Safari. Availability depends on the app; this mode does not guarantee a screenshot of every conversation.
Screenshots on Android
On Android, the available methods depend on the manufacturer and system version. Start with buttons; menus, gestures, and scrolling screenshots are not available on every device. If a method does not work, check the manufacturer’s instructions.
Method 1 (buttons). On most devices: power + volume down. Press briefly rather than holding the buttons down for a long time.
Method 2 (Quick Settings). If your device has a Screenshot tile, open Quick Settings and tap it. On some phones, Screenshot appears in the power menu; these options depend on the manufacturer.
Method 3 (gestures and scrolling screenshots). Some devices support a three-finger gesture or display a Scroll/Capture more button immediately after a screenshot. This helps capture content farther down the screen.
Screenshots on Windows
On Windows, remember one shortcut for work and one backup method. Selecting an area is useful for work: it leaves less clutter in the image and makes it easier to paste into a chat.
- Win + Shift + S — area-selection mode (the captured section goes to the clipboard, ready to paste into a messenger).
- Win + PrtScn — saves the full screen directly to a file (usually in Pictures → Screenshots).
- Alt + PrtScn — copies the active window to the clipboard (useful for showing only a window without the taskbar).
Screenshots on macOS
In macOS, you can enable a floating thumbnail: click it after taking a screenshot to crop and share the image. You can configure the thumbnail in the Screenshot tool’s options.
- Cmd + Shift + 3 — the entire screen.
- Cmd + Shift + 4 — select an area (the pointer becomes a crosshair).
- Cmd + Shift + 5 — the Screenshot panel (which also includes screen recording).
Where can you find a screenshot and share it with fewer steps?
A screenshot is either a file or an image on the clipboard. For work, the latter is particularly useful: capture a section → paste it into a chat → continue the conversation.
Where screenshots usually end up:
- iPhone/iPad: the Screenshots section in Photos; its location depends on the system version.
- Android: Gallery/Photos → Screenshots album (the name depends on the device software).
- Windows: either the clipboard or Pictures → Screenshots when you use Win + PrtScn.
- macOS: the desktop by default; you can change the save location in the Screenshot tool’s options.
If you are sending a screenshot to a customer, check the whole image first: notifications, open chats, card numbers, and other personal information. A few seconds can prevent lengthy explanations and unnecessary questions.
When you need to show progress remotely, one screenshot may not be enough: you may want to provide access to a live stream from the site. The 101 blog has a detailed guide to 101 Vision, including how to share a live-stream link (in Russian).