

A design brief tells the designer exactly what the client expects instead of leaving them to guess. It records requirements, constraints, budget, deadlines, and approval rules. This makes the design project easier to manage, reduces revisions, and limits disputes about costs.
Contents:
Why does a designer need a brief?
A design brief is a short document answering two questions: “What are we doing?” and “How will we know it has been done properly?” Without it, every participant imagines a different project: designer, client, contractor, and procurement specialist. The differences surface during construction, when mistakes cost more to correct.
For a small project, two or three pages plus attachments (measurements, photos, references) are often enough. Length matters less than clarity: what is included or excluded, acceptance criteria, constraints, approval times, and who authorizes changes.
A familiar example: a family moving into a new apartment asks for something “bright and functional.” A month later, it turns out they need a home office with a door, a place to practise music, and storage for sports equipment. The designer can solve all this; the question is whether they hear about it before or during the renovation.
How can you gather inputs without weeks of clarification?
Treat the brief as an interview with yourself: facts first, then daily-life scenarios, preferences, and finally constraints. Do not try to design the solutions immediately.
A useful warning sign is being unable to answer a few basic questions at the start. The designer will then spend time clarifying them instead of designing. In construction and renovation, the client defines the project idea, goal, budget, and their role in approvals during this preparation stage.
A practical way to collect inputs:
- Gather facts about the property: address, building type, floor, area, ceiling heights, windows, service risers, ventilation, electrical supply, wet areas, building-management requirements, and remodelling constraints.
- Photograph the property systematically: wide views plus close-ups of technical details (electrical panel, risers, water inlet, windows, radiators). For an existing home, also document hidden problems such as cracks, leaks, and uneven surfaces.
- Describe who will live there and how: household members and ages, daily routines, home working, hobbies, pets, guests, storage, and cooking habits.
- Set priorities: which matters most—move-in date, implementation budget, material durability, ease of cleaning, or acoustics?
- Define the deliverables you expect: 3D visuals, working drawings, specifications, schedules, design supervision, or procurement support.
To describe needs more fully, designers often profile a client’s lifestyle, style preferences, pain points, concerns about time and budget, and preferred communication channels. This helps them meet expectations from the concept stage onward.
What should you include in the brief?
The structure below works for an apartment or house. Shorten it for a small project or expand it if the work involves remodelling, procurement, and several contractors.
| Brief section | What to record | How to know it is enough |
|---|---|---|
| Project goal | Who the renovation is for, planned move-in date, and what counts as success | A date or period and three to five clear outcome criteria |
| Rooms and spaces | Required rooms, their functions, and whether a guest room, pantry, or laundry room is needed | A daily-use scenario and storage needs for each area |
| Layout and remodelling | What cannot be changed, what you want to change, and views on combining the kitchen and living room | Clear approval responsibility and boundaries of acceptable risk |
| Style and mood | 10–20 references, with what you like or dislike and one or two comments on each | The references are explained in words so the designer knows what appeals to you |
| Materials and exclusions | What you would use or reject (plain cabinet fronts, wood, stone, porcelain tile, microconcrete) | Reasons are recorded: maintenance, allergies, children, wear, or acoustics |
| Building services | Air conditioning, underfloor heating, fresh-air supply, water treatment, smart-home functions, and lighting scenes | Clear separation between confirmed and tentative systems |
| Implementation budget | A budget range for construction and separate allowances for furniture, appliances, and lighting | A maximum that cannot be exceeded without approval |
| Schedule and participation | When you are available, response time for approvals, and who makes the final decision | An agreed rule: respond within N days or the schedule moves |
| Designer’s scope | What the design project includes, number of revision rounds, and how each stage is accepted | A defined deliverable for each stage (plans, mood boards, visuals, drawings) |
A common example: a client brings 30 Pinterest images and says “I want it like this.” Some show white walls and black windows, others warm wood and brass, and still others concrete and exposed services. The designer needs your comments on what exactly to take from each image: lighting, storage, mood, materials, or layout.
How should you format and hand over the brief?
The format matters less than readability, approval, and easy updates. Google Docs or Notion is often enough, with a PDF exported later. Keep attachments in a clearly organized cloud folder.
Formatting practices that help:
- One document, one current version. Put the date in its name, keep a change history, and record who approved each change.
- Keep references in a separate section. Use folders for “like” and “not suitable,” with short comments on each file.
- Define approval checkpoints. Layout, concept, visuals, and drawing set should each have a clear deliverable and response deadline.
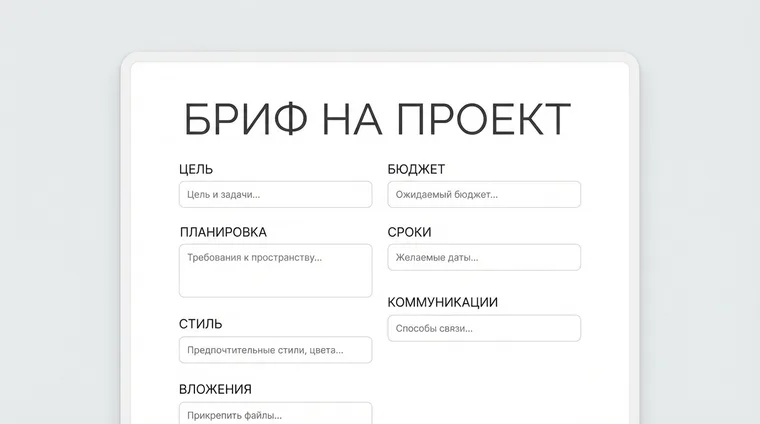
For collaboration, keep the current brief, tasks, photos, and approved decisions somewhere everyone can access instead of searching chats. Ideas for organizing work appear in our 101 App article collection and our article on project management tools (in Russian).
Common briefing mistakes and how to avoid them
1) “I want modern” without criteria. Replace subjective words with testable requirements: “plenty of closed storage,” “few open shelves,” “a kitchen island,” or “blackout blinds in the bedroom.”
2) Too many references without explanations. Keep 10–20 and add a note to each explaining what you want to use. The designer can then develop a concept faster.
3) The budget is hidden until the end. The designer will plan for a different price range, and the work will need revising. Give an upper limit and identify what you could optimize if needed: materials, brands, or some furniture.
4) No rules for revisions. Record how many rounds each stage includes and how it is accepted. The aim is to describe the scope clearly enough to avoid disputes.
5) The brief is separate from the contract. If you expect procurement or design supervision, decide early how documents and responsibilities connect to the contract. 101’s Russian legal articles discuss procurement-contract terms: scope, communication, delivery times, acceptance, warranties, and approvals.
You can also read about basic construction and renovation contracts: renovation and finishing contract (in Russian) and construction contract (in Russian).