A work acceptance certificate records what the contractor hands over to the client: what work was completed, where, during which period, and for what amount. Before sending the certificate, check the actual quantities, both parties’ details, and any agreed changes.
The estimate shows what was planned, while completion reports show what was done. If quantities change or additional work is added, record the agreed changes. The certificate can then reflect the work actually completed, and the client can check it against what was agreed.
In 101, you can generate a certificate from project data, check it, and share it with the parties. Acceptance of the work and signing the certificate are separate steps. The instructions below cover the mobile app and web version, with a separate procedure for Form KS-2 (КС-2) on Russian projects.
Contents:
Why use a work acceptance certificate?
The parties use the certificate to record the outcome of acceptance under the contract: which work and quantities were accepted, the period covered, and the agreed cost. If there are comments or objections about any of the work, record them as the contract specifies.
Choose the document type based on what you need to record and what the contract specifies. A stage certificate describes the work completed for that stage. A final certificate covers the agreed scope of work for the site.
When the contractor keeps reports as the work progresses, they can check the certificate’s line items against the work actually completed and spot discrepancies before sending it. Use completion records to verify actual quantities, which the original estimate only lists as planned quantities.
For Russian projects, see our guide to the Form KS-2 work acceptance certificate (in Russian).
Which documents are used to accept work?
Site documents serve different purposes. One describes the work handed over to the client, another confirms its cost, and a third records the condition of work before subsequent layers cover it.
Check which documents your project requires. Here are some examples:
- A work acceptance certificate lists the work, quantities, and costs for a stage or period. KS-2 is a form of this certificate for Russian projects where it applies.
- Form KS-3 (КС-3) is a separate Russian statement of the cost of completed work and expenses. It serves a different purpose from KS-2.
- A concealed work record documents the work before subsequent layers cover it. Its contents and how it is prepared depend on the project requirements.
The names of the Russian forms are listed in Resolution No. 100 of Russia’s State Statistics Committee (in Russian). For more on what each form is used for, read about the differences between KS-2 and KS-3 (in Russian).
What should you check before sending the certificate?
Before sending the certificate, make sure it shows what work was completed, in what quantities, at which site, and over which period. Reference the contract and check the amounts against the supporting records.
Use this checklist to verify the document. Follow the contract and applicable requirements to determine which fields are mandatory and how to sign.
- Parties’ details and a reference to the contract, with its number and date if applicable.
- The site and the period or stage the certificate covers.
- A list of the work, with units of measure, quantities, and costs.
- Total amounts and how any advance payment is accounted for, if applicable.
- Signatures and details of the parties’ authorized representatives.
- Attachments specified in the contract, such as reports, photos, or schedules.
If the contract provides for acceptance by stage, check in advance how to give notice, which deadlines apply, and how to record any comments or objections. For an example from a Russian project, see the 101 blog article on remote approval of project events (in Russian).
How do you organize acceptance by stage?
Organize acceptance by stage if the contract provides for it. The contractor records work as it is completed, gathers the details for the relevant period, and checks them against the certificate. The client then gets a document they can check against specific work items.
If you keep information in messages, agree in advance on where the team will record quantities, changes, and handover dates. This makes the certificate easier to check before acceptance.

Follow these steps:
- Record the completed work. Include the quantities, the location, and the corresponding estimate items. Add a photo or comment if needed.
- Compile a report for the period. Check that it reflects the work completed and any changes agreed separately.
- Prepare the certificate using the records of completed work. Check the descriptions and amounts before sending it for approval.
- Notify the client about acceptance as the contract requires. Record any objections or comments.
- Once the certificate is agreed, sign it using the specified method. File a copy and the attachments in the project archive.
If the parties want to change the terms of a Russian contract, see our guide to the protocol of disagreements (in Russian).
How do you generate a work acceptance certificate in 101?
Open the documents for the relevant project and choose the work acceptance certificate. The period and document type determine what you need to check in the finished file. For detailed steps, see the help guide to generating a work acceptance certificate (in Russian).
Choose the method for your device:
- On a phone. Enter the contract details and your own details for the document in the project documents. Choose the work acceptance certificate and the period, then generate a PDF. Check the file and use the share option to send it.
- In the web version. Check the party details in the project information. In the documents section, choose the work acceptance certificate, set the period, and select PDF or Excel. Generate the document. A PDF opens for preview, so check it and then save it. An Excel file downloads as soon as it is generated, so open the downloaded file and check the data. If your role in the project is client, the standard certificate will be hidden from the list of document types.
- Before sending. Check the work listed, the dates, the amounts, and the parties’ details. If the PDF generated on your phone includes a separate certificate for agency services, for example because of a procurement markup, check its amounts too.
Generating a file and confirming individual project events are separate from the parties agreeing on and signing the certificate. Send the checked document and sign it as specified by the contract and applicable requirements.
How do you generate Form KS-2 for a Russian project?
Check whether the contract or applicable rules require the Russian Form KS-2. In the web version of 101, look for it in the project’s list of document types. It appears when the current user’s profile is set to the Russian jurisdiction. Select Form KS-2, the expense category, the period, and either PDF or Excel. Generate the file and check the work listed and the amounts against what was actually completed. See also our guide to preparing Form KS-2 in 101 (in Russian).
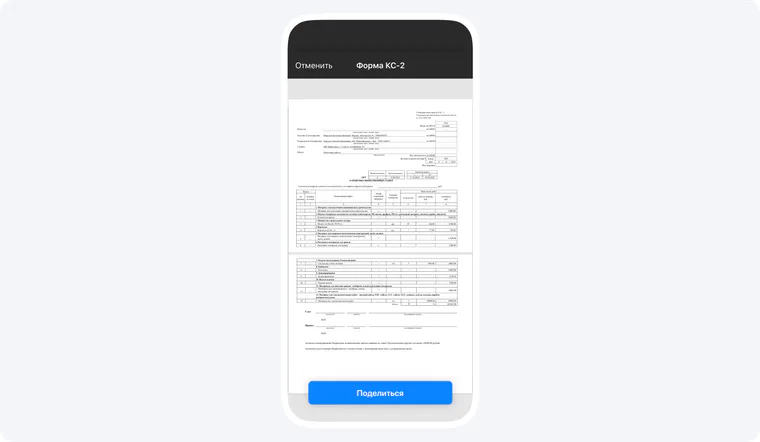
Prepare the certificate from records of completed work. If you still keep your plan in Excel, you can separately import line items from Excel into the estimate (in Russian). Verify that the work was completed using separate completion records.
Keep the supporting reports and any attachments the project requires with the certificate. For Russian projects, see our guide to maintaining as-built documentation (in Russian).
If you need a file with your company logo, check whether branding is available on your plan for the document type you selected. Open the finished file and check its appearance before sending it.
Send the checked certificate to the client, agree on how to address any comments or objections, and keep the signed copy. Store the reports and attachments with it so the parties can check the accepted work against what was actually completed.