An estimate screenshot often arrives in a chat at an inconvenient moment: a customer asks you to “calculate the same thing”, a designer sends a table as an image, or a site supervisor shares a phone screenshot. Manually entering line items into your records takes time and can introduce errors in rows and numbers.
In 101, AI helps you import line items into a “Смета” (Estimate) or “Отчёт” (Report). On a computer, you can submit the screenshot itself; in the web version on a phone, you can use text prepared in advance. After recognition, check the rows, explicitly select the required units of measurement and reopen the saved estimate.
Below, we explain how 101 recognizes an estimate, what to prepare before importing it and which parts of the result need checking.
Contents:
- What does estimate recognition mean in 101?
- How do you make an estimate screenshot readable?
- How do you import an estimate from a screenshot into 101?
- What can AI recognize, and where can errors occur?
- How can you work with an estimate after importing it?
- Who can benefit from importing an estimate screenshot?
What does estimate recognition mean in 101?
Recognition helps prepare rows containing item names and numbers, which you then check in an event called “Смета” (Estimate). This is the event’s current name; “preliminary calculation” describes its purpose. The available import methods differ between a phone and a computer, as explained in the official 101 Help article (in Russian).
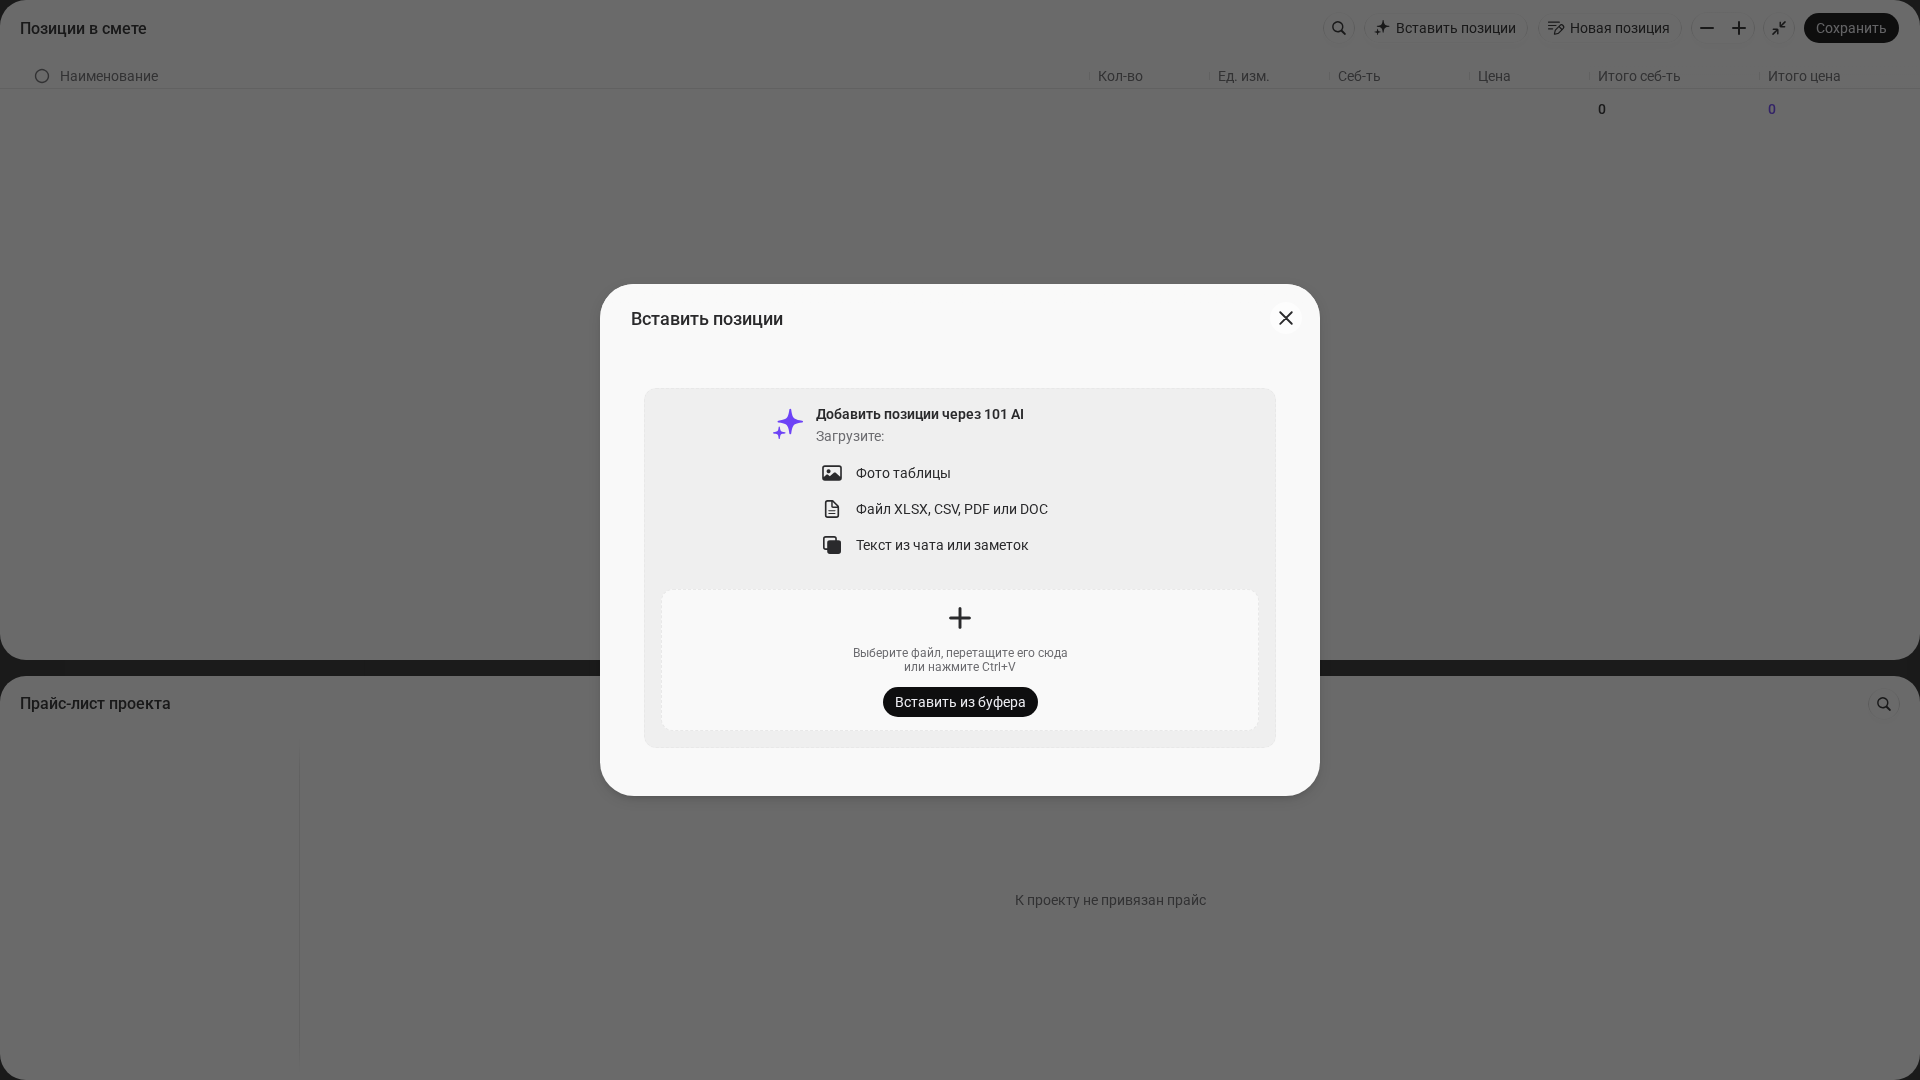
A screenshot contains an image of a table. On a computer, the “Добавить позиции через 101 AI” (Add line items through 101 AI) panel accepts a photo of a table, as well as XLSX, CSV, PDF, DOC and text. On a phone, prepare readable text using an available method and compare it with the image before pasting it. If you have the original spreadsheet, see the guide to quick estimate imports from Excel (in Russian).
The illustrations show the Russian interface of the 101 web version. For control names in the phone app, check the relevant Help section.
How do you make an estimate screenshot readable?
Errors can occur both when a device extracts text and when 101 recognizes an image: digits, units or column boundaries may be lost. A readable source makes checking easier, but any time saved depends on the document and is not guaranteed.
Before recognizing an estimate, make the screenshot readable: zoom in on the table, crop out unnecessary details such as chat headers, buttons and the status-bar clock, and keep only the estimate rows. If the estimate spans several screens, it is better to take 2–4 screenshots in sections than one long, compressed image.
Another common case is an estimate photographed at an angle. Straightening the image in a photo editor and increasing the contrast can help. Alignment may make rows easier to read and compare. You still need to check the recognition result against the original.
How do you import an estimate from a screenshot into 101?
The two web-version workflows below were verified on 26 October 2026. Prepare your source in advance: submitting a file or text starts processing, and the result requires manual checking. Import is available when the selected expense category allows custom line items.
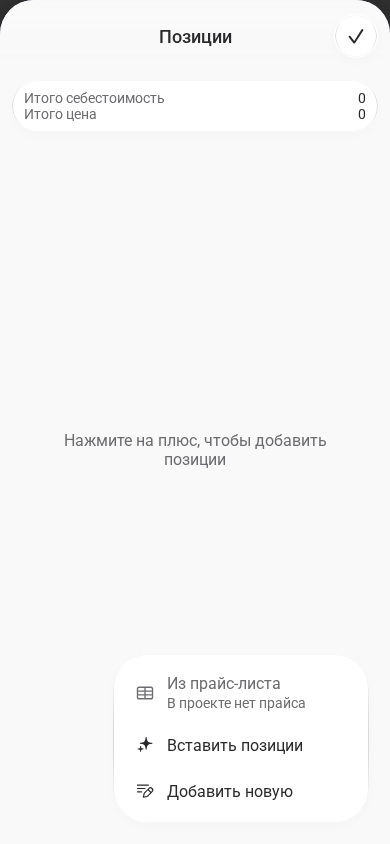
- In a browser on your phone: prepare the text from the screenshot and check the item names, units, quantities and prices. Copy it. In a new “Смета” (Estimate), select the project and expense category, then tap “Добавить позицию” (Add a line item). On the “Позиции” (Line items) screen, open “+ Позиции” (+ Line items) → “Вставить позиции” (Paste line items). In the verified example, this command submitted the prepared clipboard text for recognition.
- On a computer: in “Смета” (Estimate), open “Добавить позиции” (Add line items) → “Вставить позиции” (Paste line items). In the “Добавить позиции через 101 AI” (Add line items through 101 AI) panel, choose a file or drag the screenshot into the upload area. For prepared text, use “Вставить из буфера” (Paste from clipboard), or press ⌘V on a Mac or Ctrl+V in the paste area. Submitting the source starts processing.
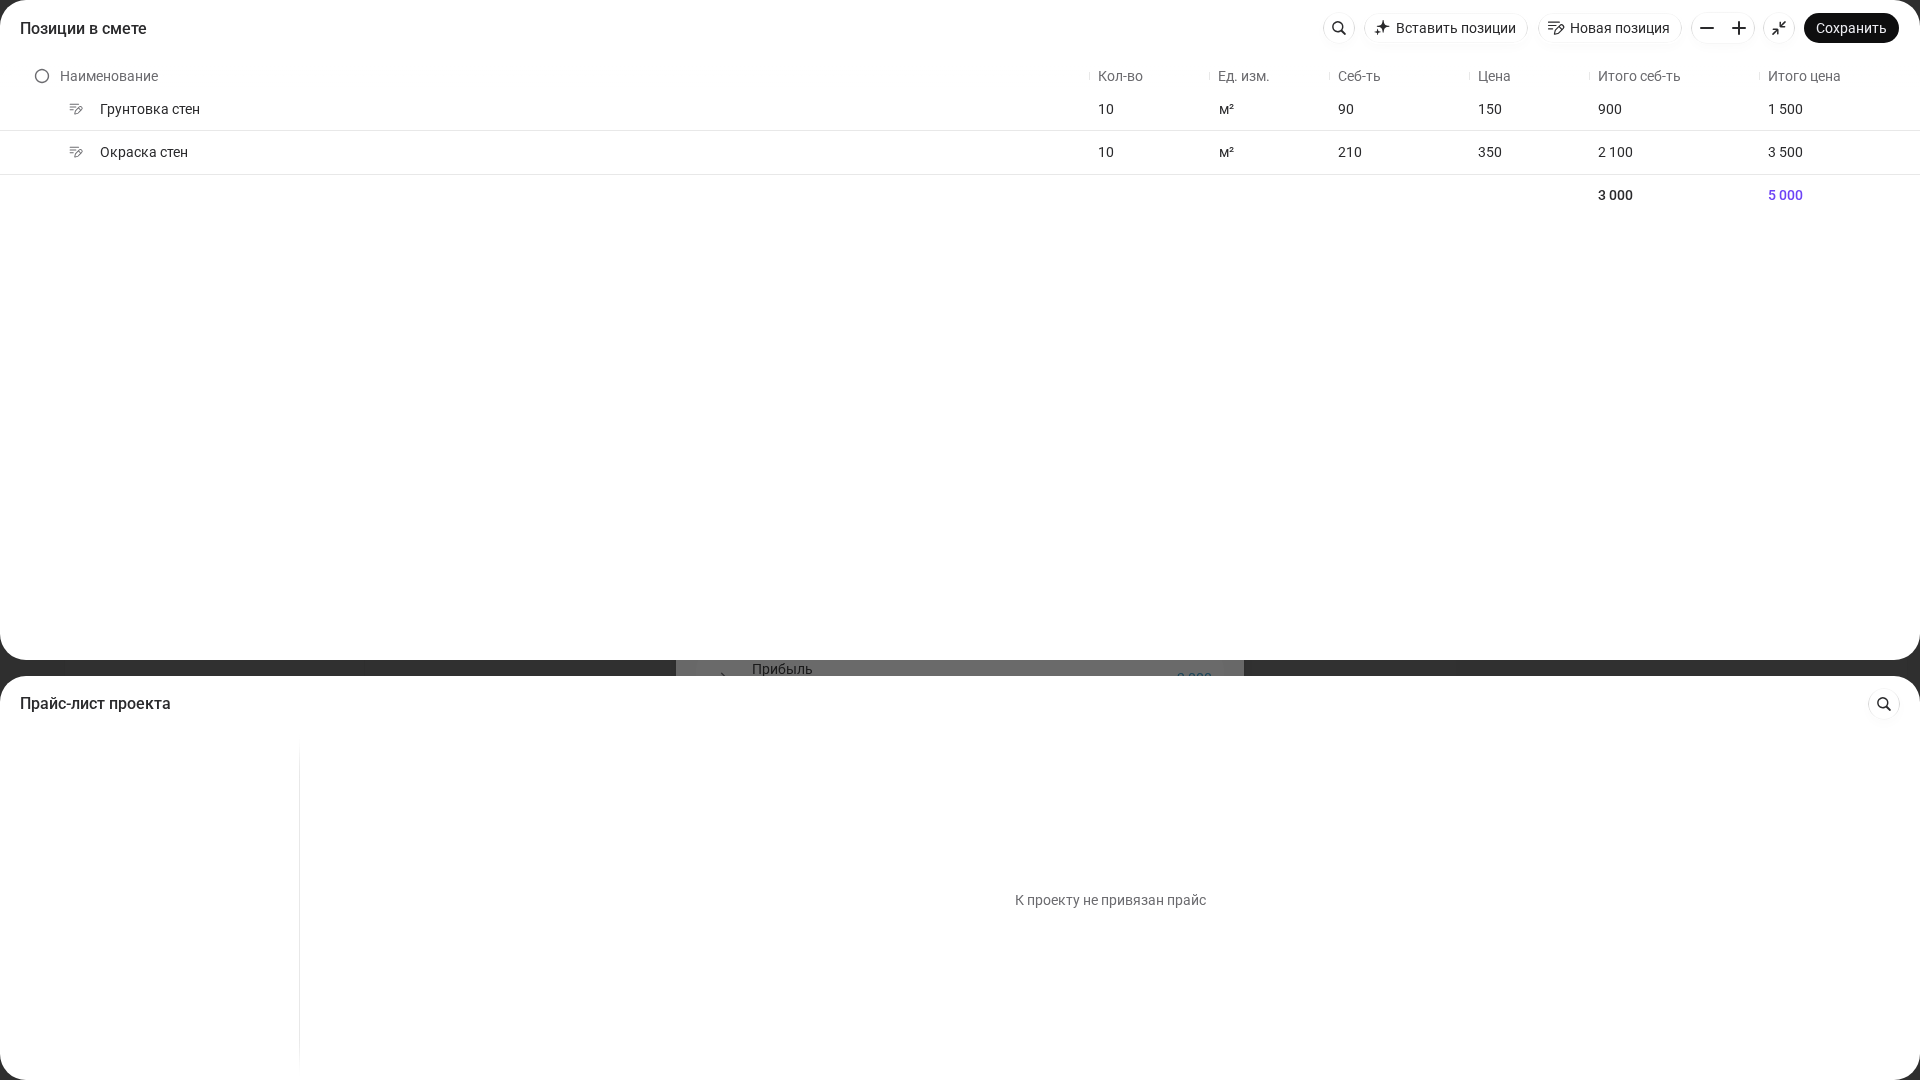
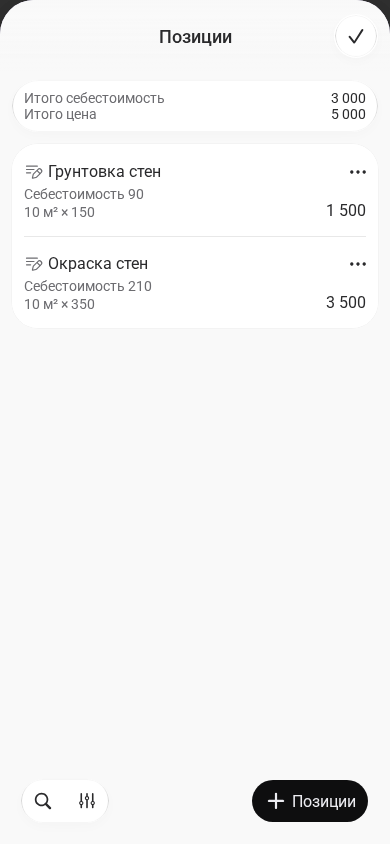
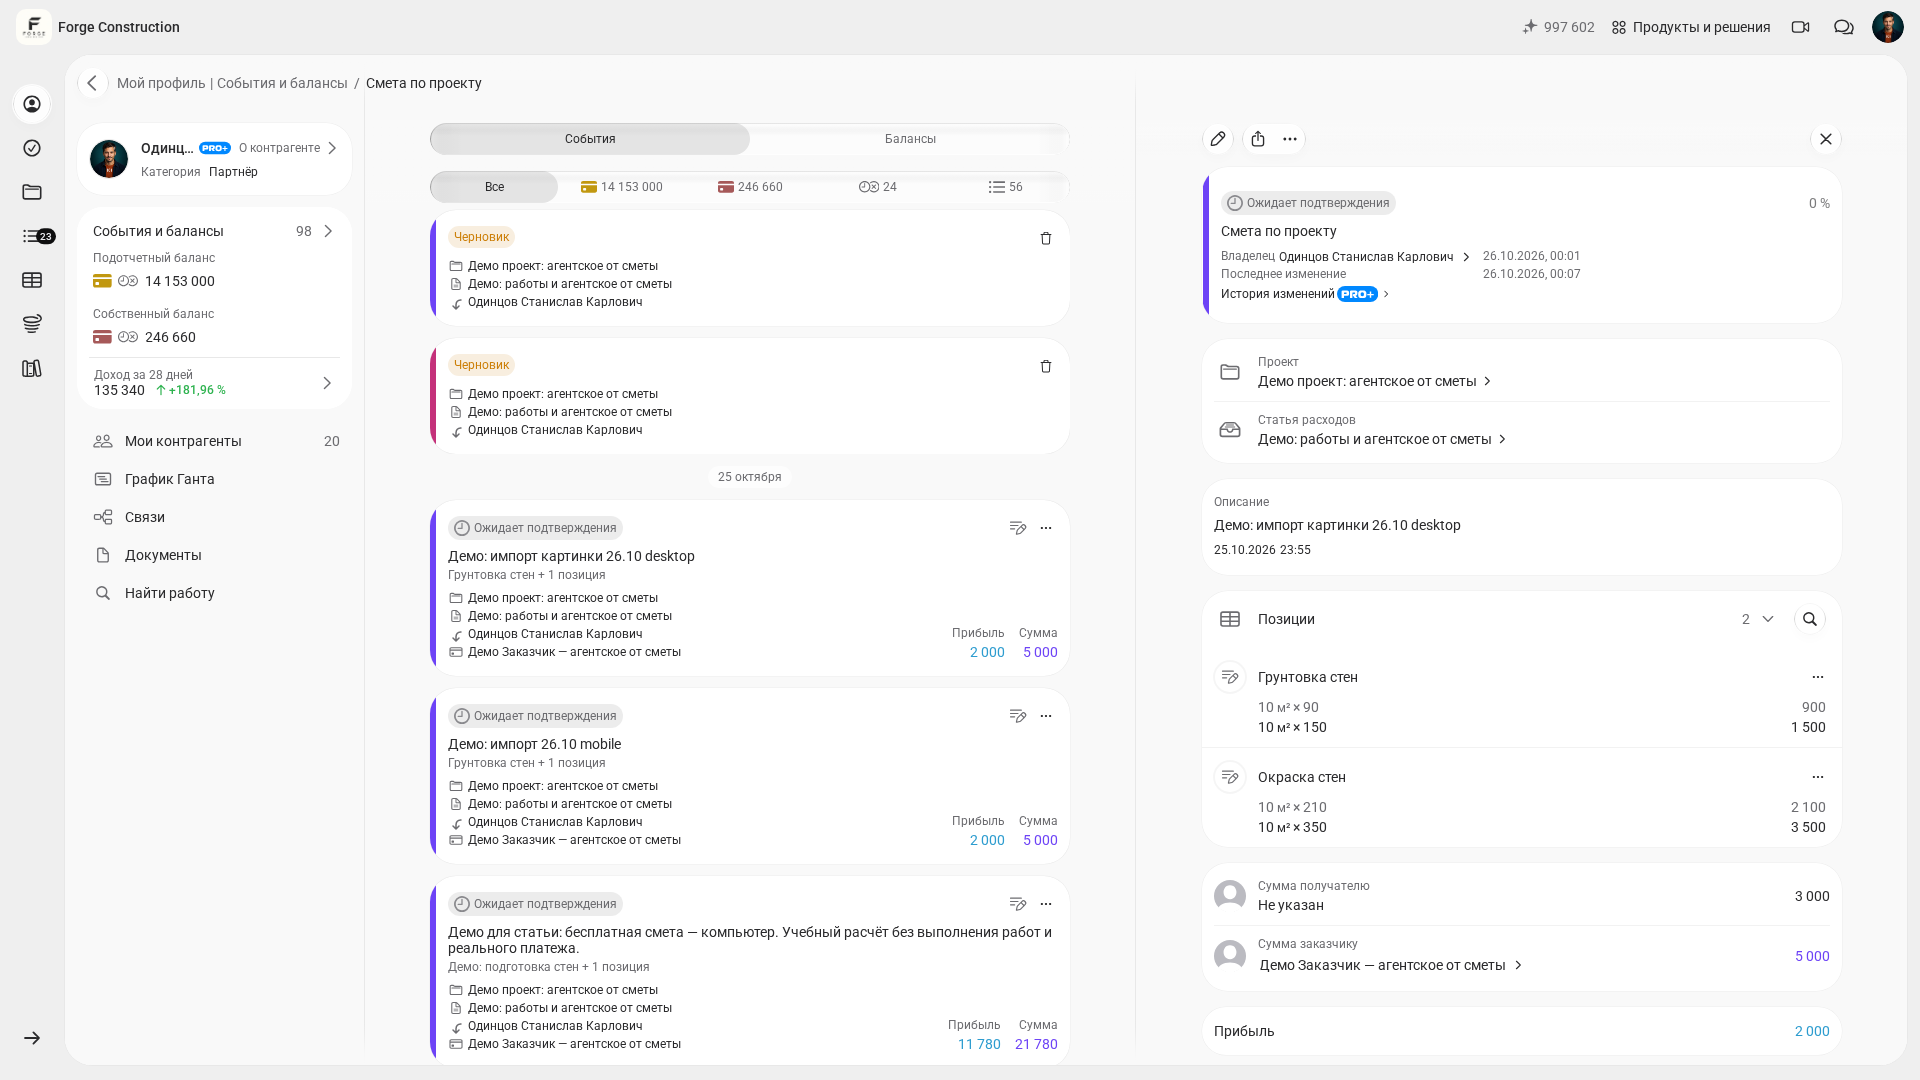
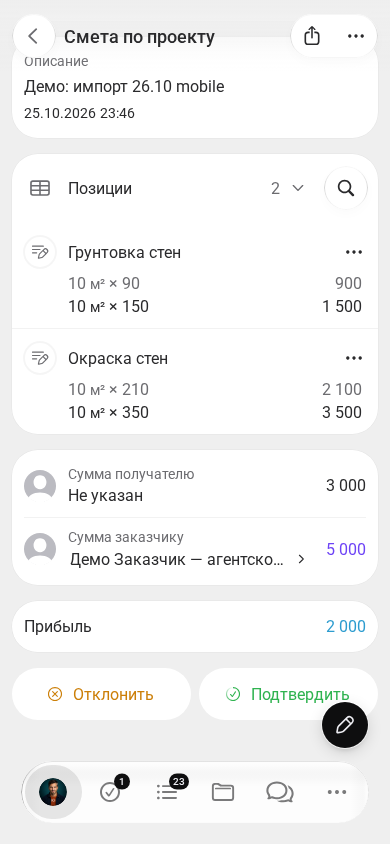
- After recognition: compare every row with the original: item names, units, quantity, price, cost and totals. Correct omissions, extra rows and rounding. The demonstration produced two items of 10 m² each: wall priming at a cost of 90 and a price of 150 per m², and wall painting at 210 and 350 respectively. The total cost is 3,000 and the total price is 5,000.
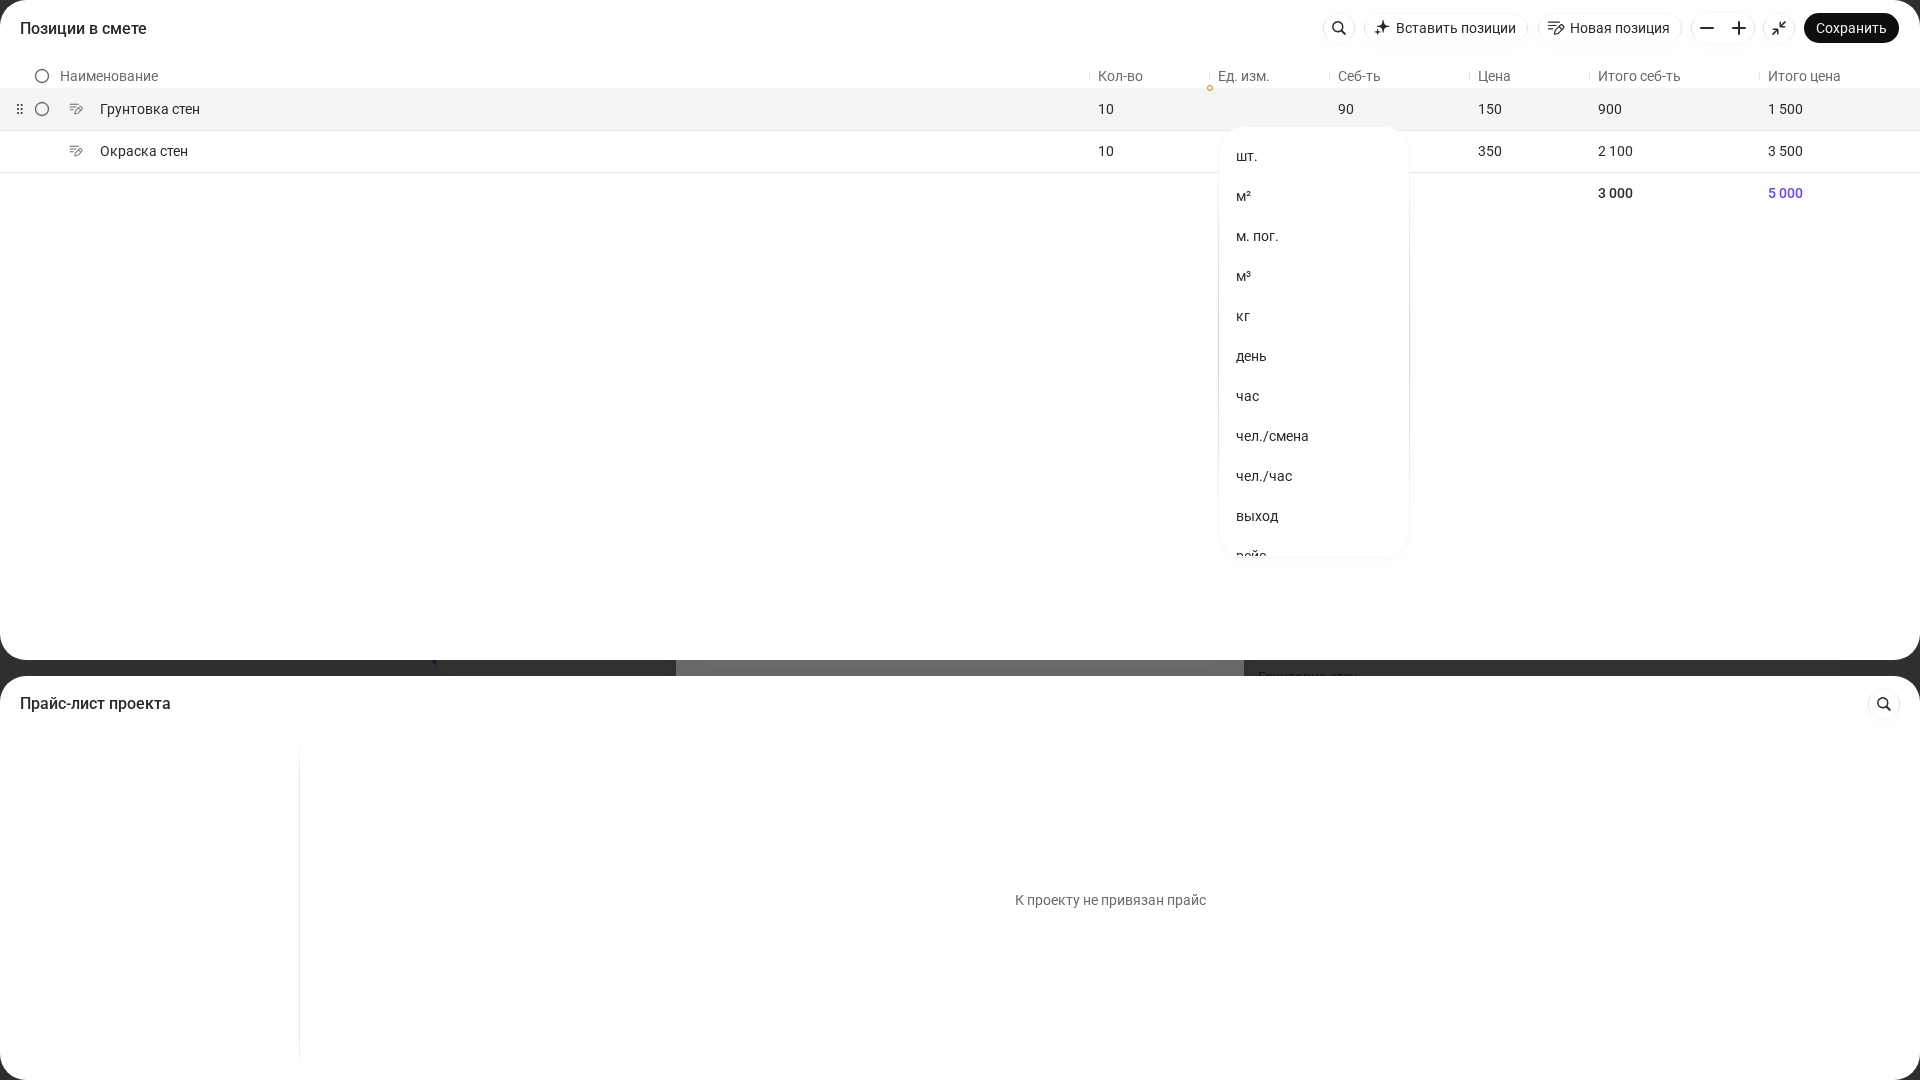
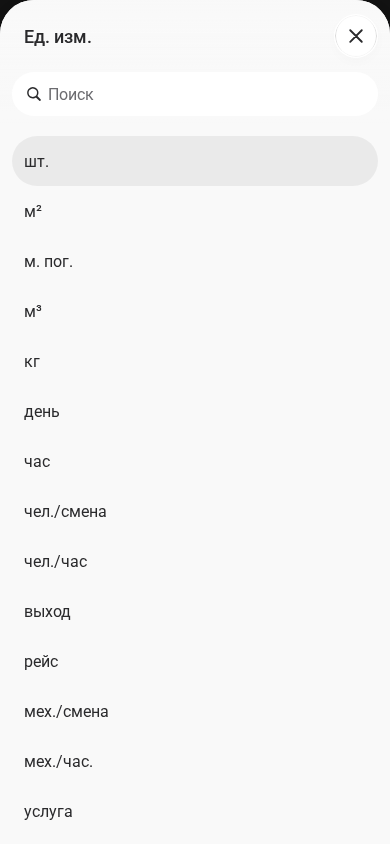
- Explicitly select the units: open each row’s unit field and select the required reference-list entry, such as “м²” (m²). On a phone, do this in the line-item editor; on a computer, use the “Ед. изм.” (Unit of measurement) column. In our example, seeing “м²” immediately after recognition was not enough: the units were not retained after the first save. Selecting them manually corrected the result.
- Save and reopen: finish editing the items with “Готово” (Done) on a phone or “Сохранить” (Save) on a computer, then save the “Смета” (Estimate) itself. Reopen that same estimate and check the units, quantities and totals. Before using it further, make sure the correct project, expense category and participants are selected. Saving does not mean the estimate has been approved or that the work has actually been completed.
If the estimate arrives as an Excel or Google Sheets spreadsheet, you can submit prepared rows without creating a screenshot: copy the range, paste the data and check the result. This workflow is covered in the article about importing an estimate from Excel with AI.
What can AI recognize, and where can errors occur?
AI attempts to identify item names and numeric fields in text or an image. Even a readable source does not guarantee that prices, quantities and totals will be assigned correctly. Make your final decision after comparing the result with the original.
Zeros, thousands separators and units of measurement can be lost in a screenshot. Do more than check the labels immediately after recognition: select units from the reference list and check them again after saving. The time needed for checking depends on the number of rows and the quality of the source.
Check “Total” rows, discounts and VAT separately: they may be incorrectly included in the list of work items or omitted. Do not remove conditions from the original calculation without checking them. Keep the original, determine which rows are actual line items and reconcile the final amount with the document.
If you need to record more than an estimate, you can use the same method in 101 to import lists of expenses from invoices, payment orders and commercial proposals. This is described in the article about importing through “Вставка AI” (AI import).
How can you work with an estimate after importing it?
An estimate imported from a screenshot usually serves two purposes: providing a clear calculation for the customer quickly, and then managing the project with a connection between planned and actual figures. This is where 101 becomes useful: the estimate becomes a working document where changes, percentages and recalculations sit alongside the movement of money.
If you want to build an estimate from line items, see “Testing the estimate builder in 101” (in Russian). It shows how to add and recalculate items and apply price increases in bulk.
If you need to prepare a preliminary calculation on your phone and reach a total quickly, see “Online renovation estimates in 101” and the short guide “How to create an estimate quickly” (in Russian).
After the first import, you may wonder whether to stay in Excel or move your estimates into a system. A separate comparison covers this question: “Excel or 101 for projects” (in Russian).
To see an import using your own example and understand how to organize your team’s processes, join a free product demonstration. We will show the workflow with your estimate and suggest ways to make record-keeping in 101 more efficient.
Who can benefit from importing an estimate screenshot?
Importing from a screenshot is useful when the source arrives as an image. On a computer, submit the image through the import panel; in a mobile browser, use checked text from the clipboard. Compare the rows, explicitly select units and reopen the saved calculation.
If the estimate is already a spreadsheet, you can copy a range from Excel or Google Sheets and submit the prepared rows through the clipboard, following the instructions for your device. After processing, check the list of items and their values.
If you only have an image, choose the workflow for your device: prepared and checked text on a phone, or direct image submission through the panel on a computer. Then check the items and the saved result. You can use the resulting estimate as a plan and record actual work separately through reports.